What are Axolotls?
[caption id="attachment_56497" align="alignright" width="372"]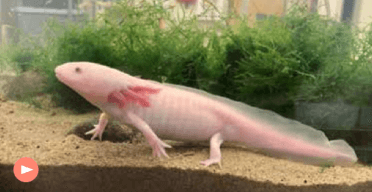 Information on axolotls
as provided by the Life Science Lab. The Life Science Lab is home to a collection of unique critters, and the most unique of all are our axolotls. You can see these animals in person in the Life Science Lab.
[/caption]Axolotls are aquatic salamanders that have recently gained popularity because of their “smiling” faces and puppy dog demeanor. What makes these cute critters so interesting, though, is the fact that they have extreme regeneration abilities.
Unlike some other regenerating creatures, axolotls can regenerate entire limbs, eyes and even parts of the heart. Scientists have been studying them for more than 150 years and still are not entirely sure how they do it. However, scientists have discovered blastema, a special clump of cells that covers the injury site.
These cells turn into various types of body cells needed to regrow the lost limb. In mammals, wounds heal rapidly and tough scars are formed. With axolotls, the blastema seals off the wound and prevents scarring, allowing more time for the regeneration process to grow a perfect new limb. Scientists hope that they learn more about their abilities as it could help with breakthroughs in modern medicine.
Visit the Life Science Lab for updates.


 Constellation Cup Activity


 Step 1:
 Step 3:
 Step 5: